


How to flash K8 Pro with entire chip erase
How to Flash K8 Pro with Entire Chip Erase
Question: How to solve the problem when the K8 Pro not working on wired or Bluetooth mode?
Answer: We can address the issue by flashing the K8 Pro with entire chip erase.
Note: If you think it is hard to follow the tutorial below, then please try the STM32programmer here.
macOS Tutorial
Step 1: Flash K8 Pro Firmware in macOS.
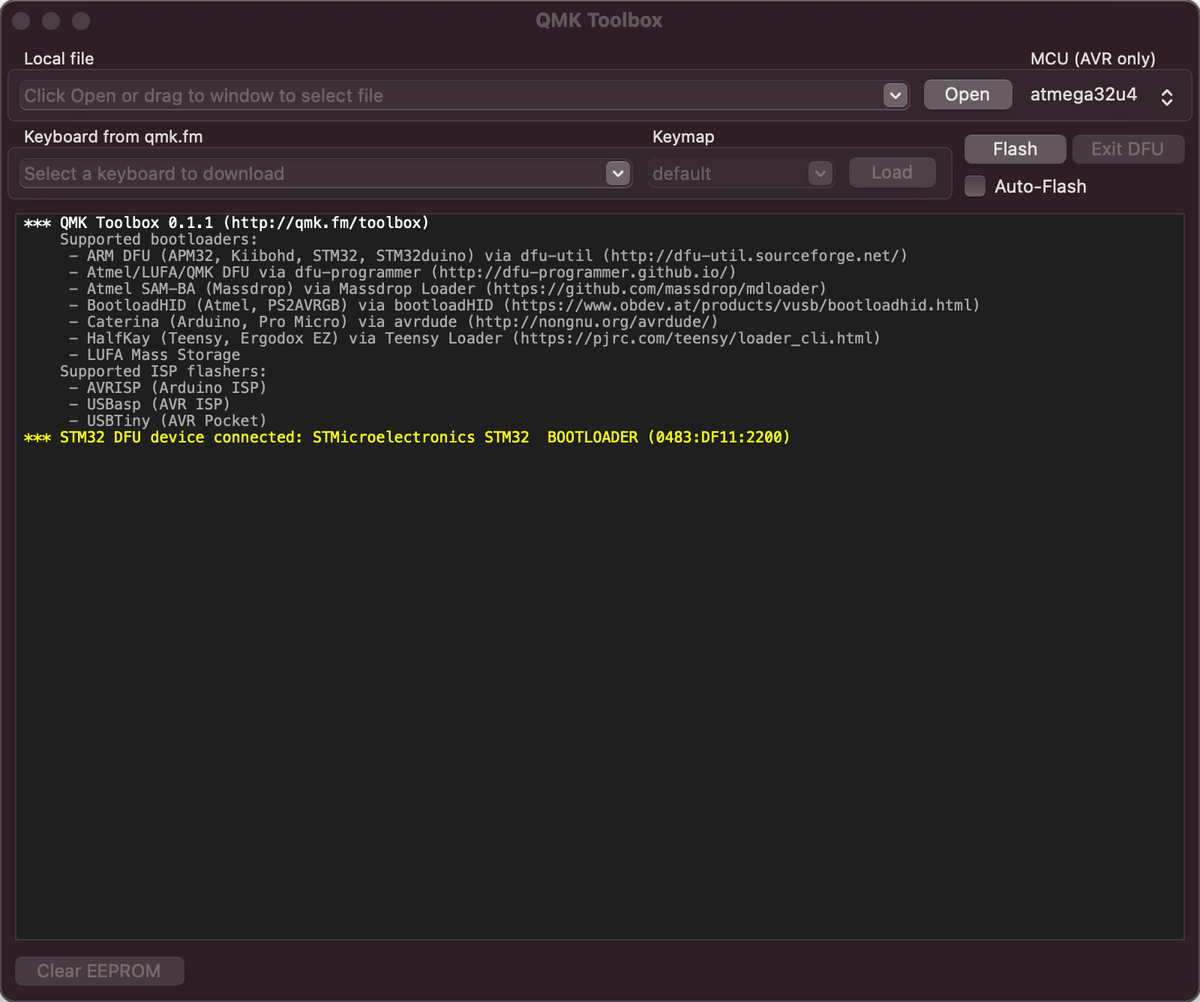
Download QMK Toolbox and save it on the "Downloads".
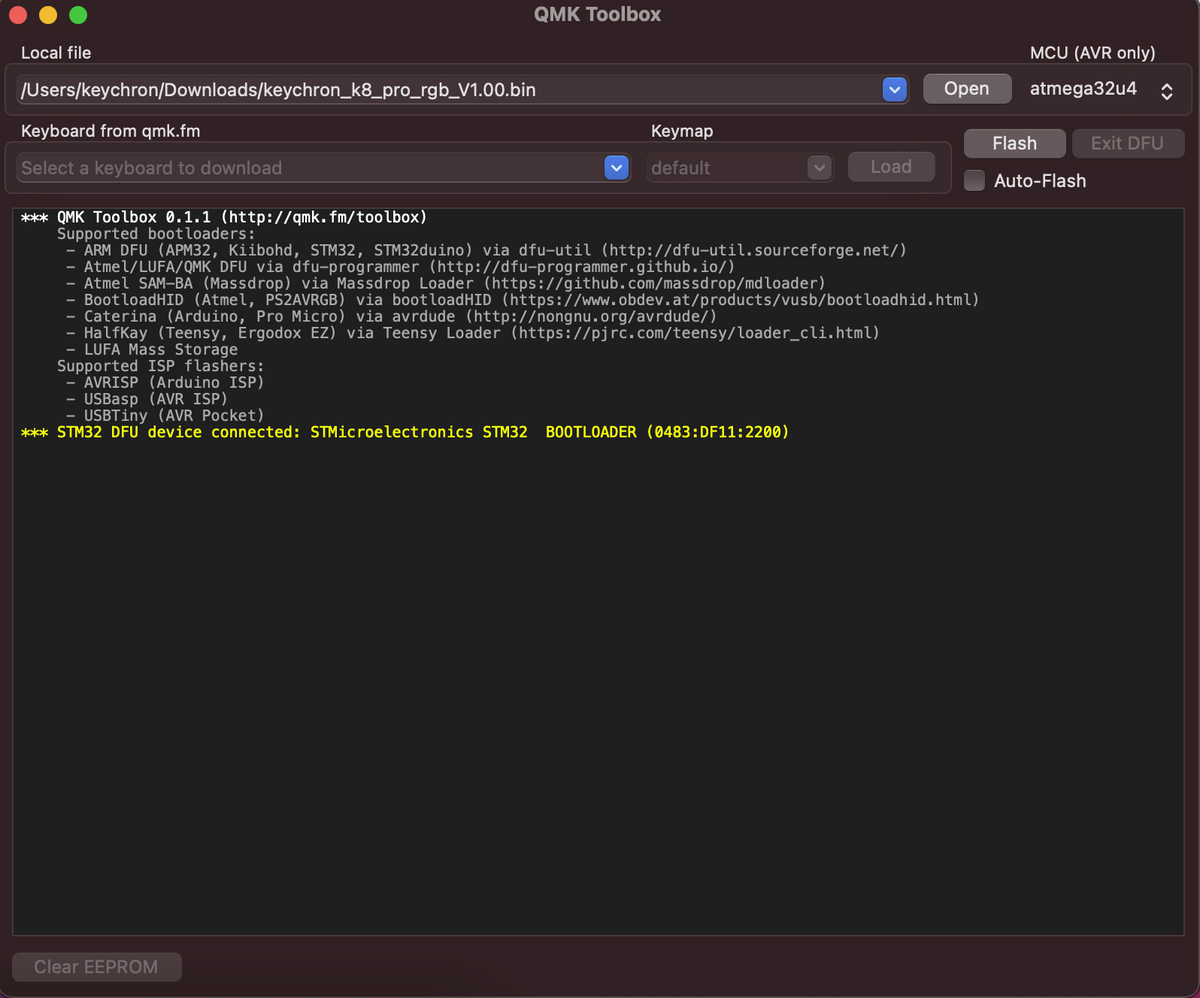
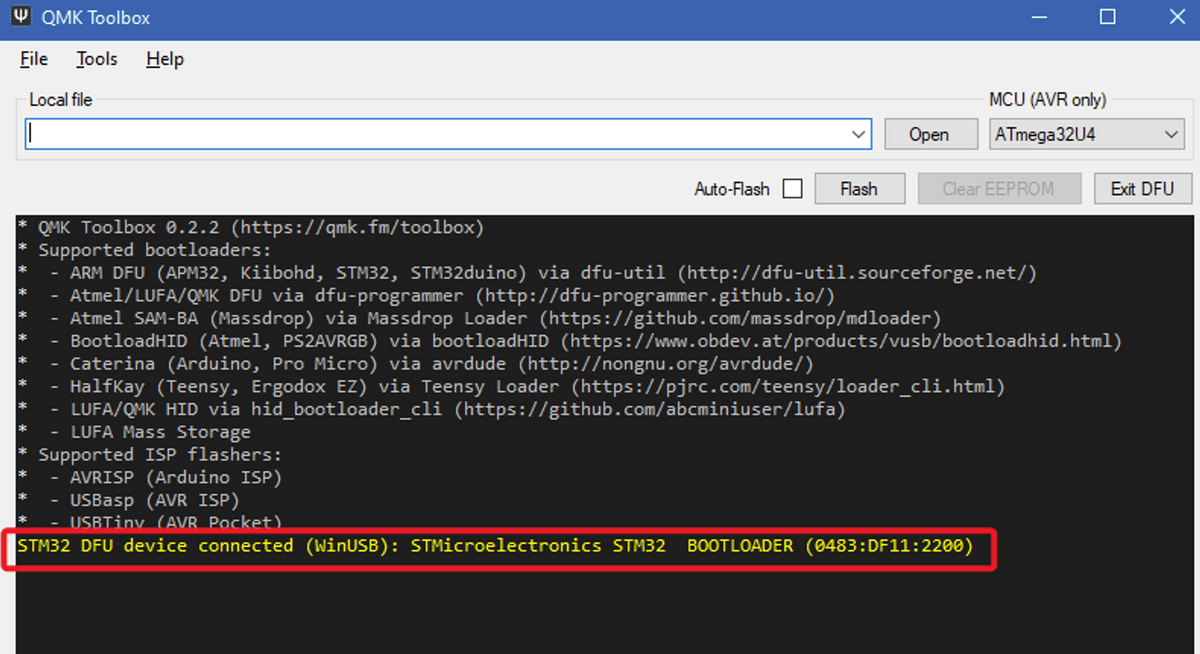
Run the K8 Pro Firmware (Based on your K8 Pro keyboard version to select the right firmware) in the QMK Toolbox. Slide the switch toggle to "Off" and connect the USB cable, hold down the "Reset" button under the space bar, and then slide the toggle to "Cable". QMK Toolbox will show a yellow line about Bootloader device.
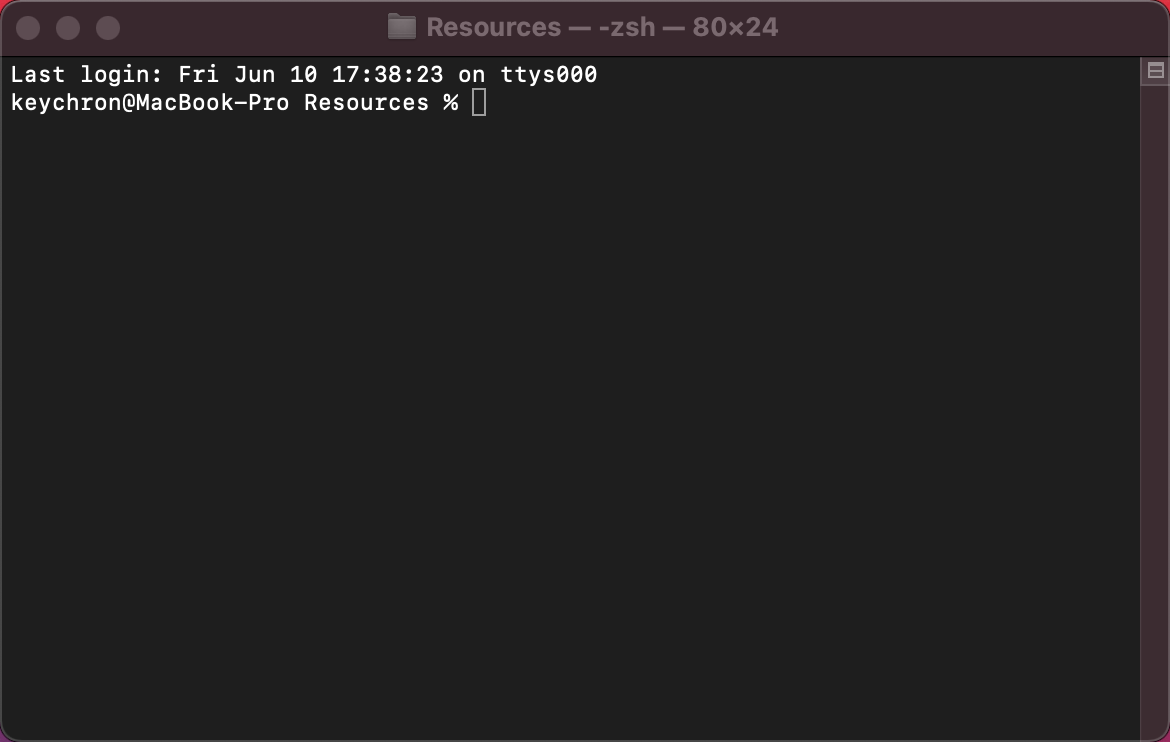
Step 2: Run the terminal.
At the moment the K8 Pro Keyboard cannot work, please use your Macbook keyboard or another Bluetooth keyboard to connect your Mac and carry on to the next step: Run the Terminal.
Open the Finder and click the "Downloads" section to find the QMK Toolbox. Then right-click the QMK icon and select "Show package content">>"Content">>"Resource".

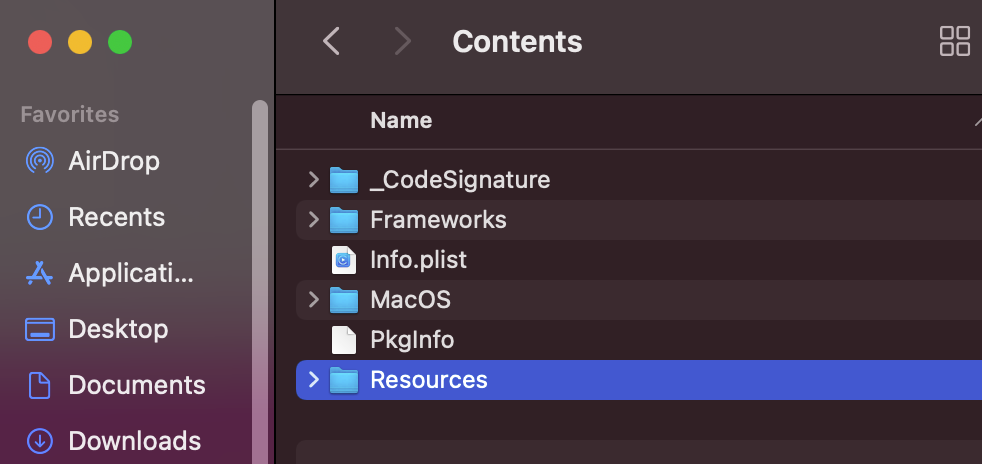
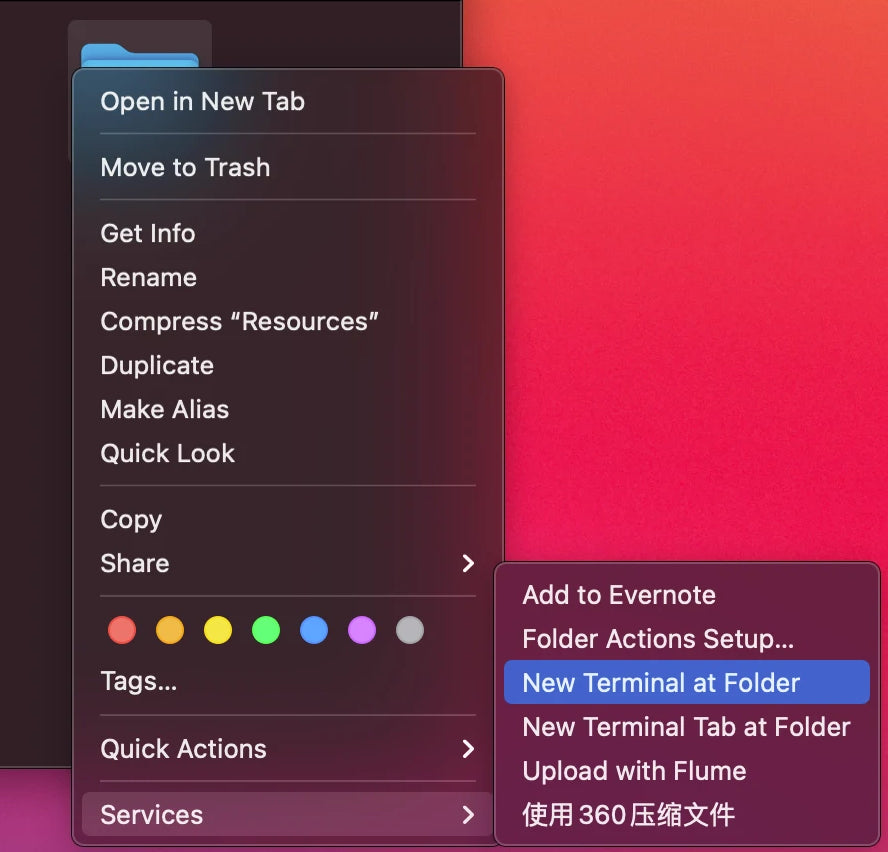
Right-click the "Resource" section and select "Services">>"New Terminal at Folder".
Step 3: Get the firmware file name.
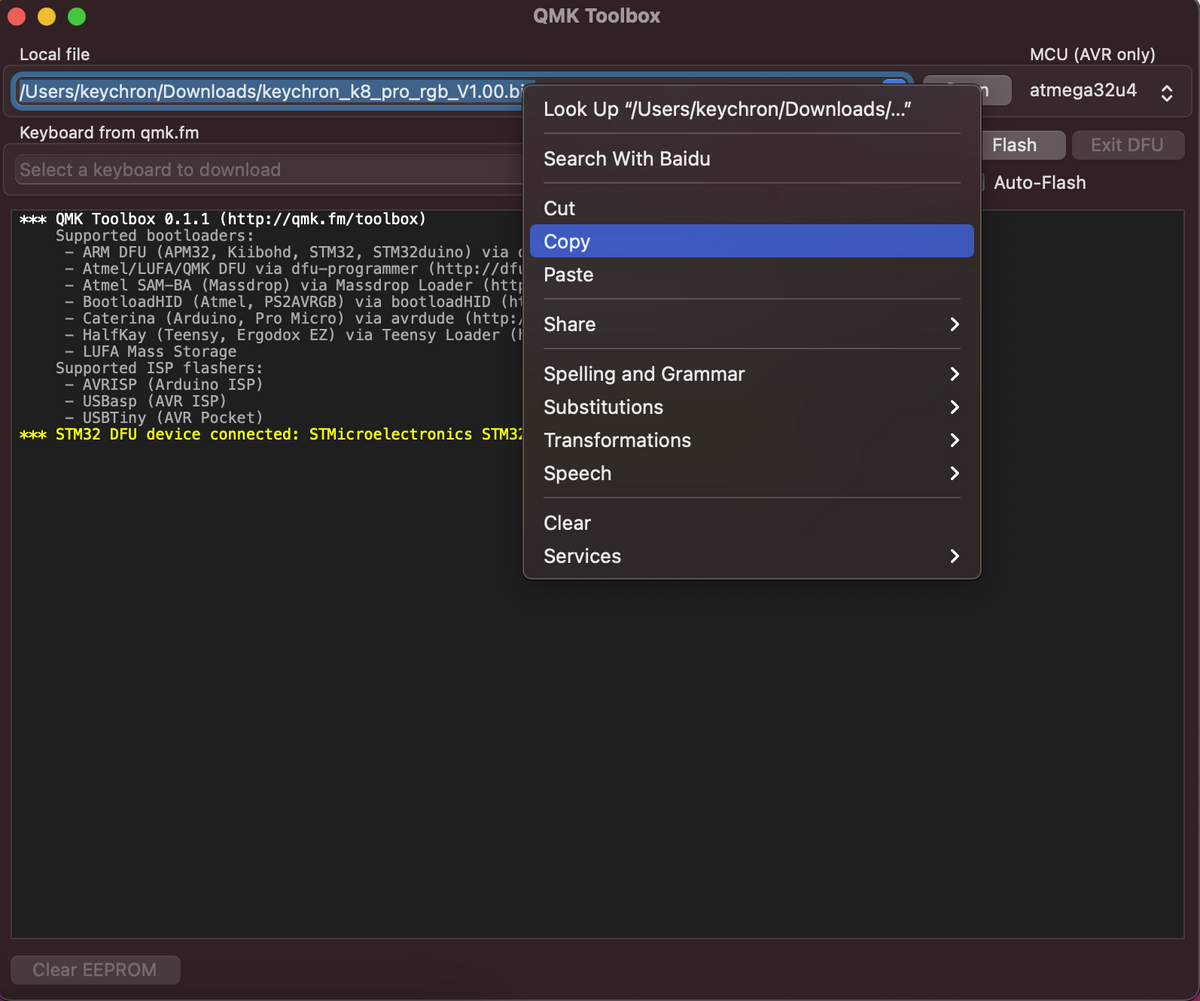
Click the “Open” button in QMK Toolbox and select the firmware files. We can see the firmware name in the “Local file” field, we will use this name later.
Step 4: Flash the firmware to the keyboard.
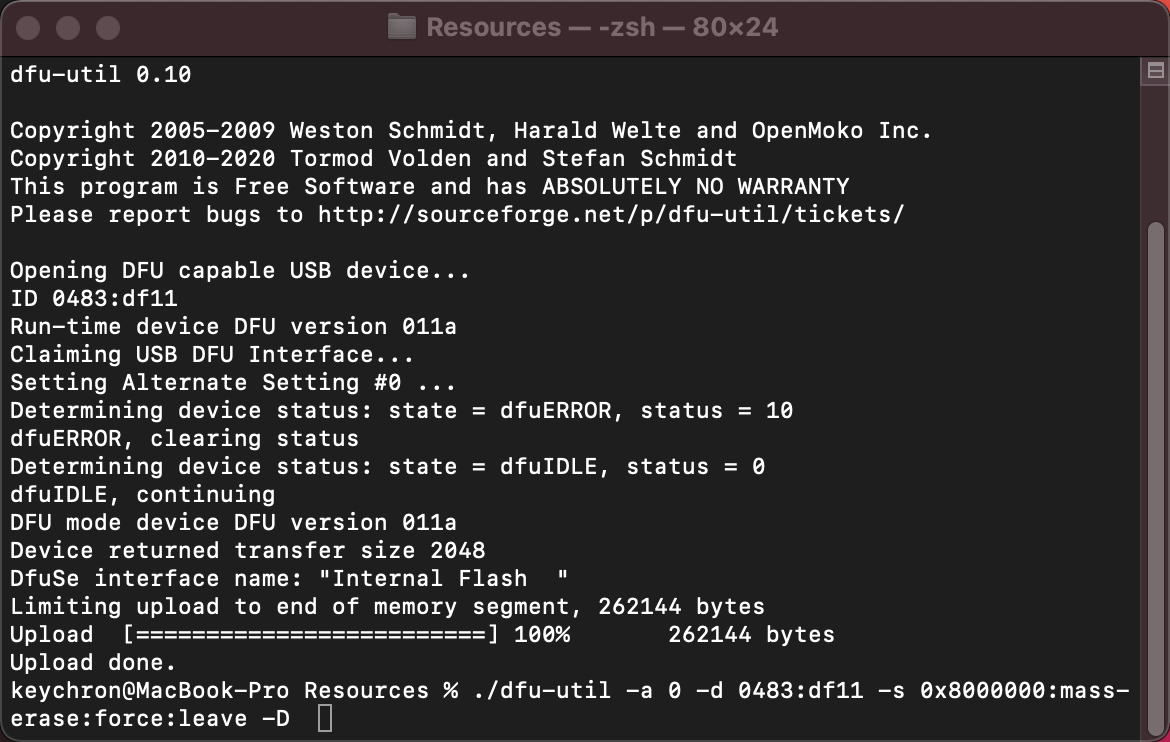
Copy and paste the following code to the terminal and add a space at the end, DO NOT press enter key.
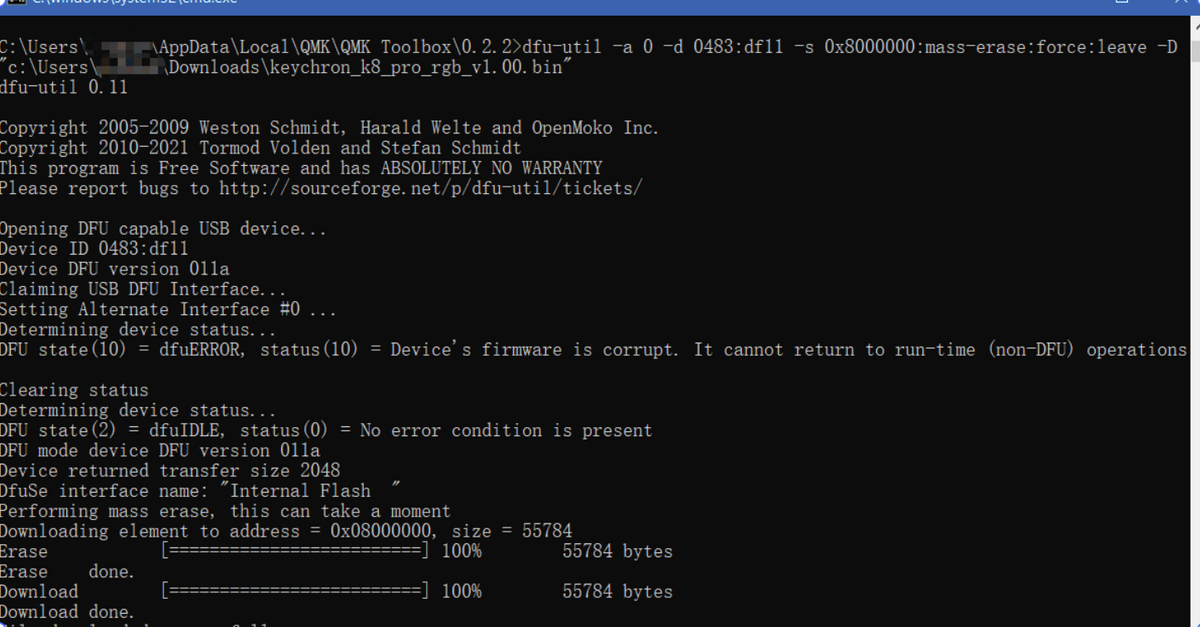
The code: ./dfu-util -a 0 -d 0483:df11 -s 0x8000000:mass-erase:force:leave -D
Switch to QMK Toolbox, select full firmware file name, and copy.
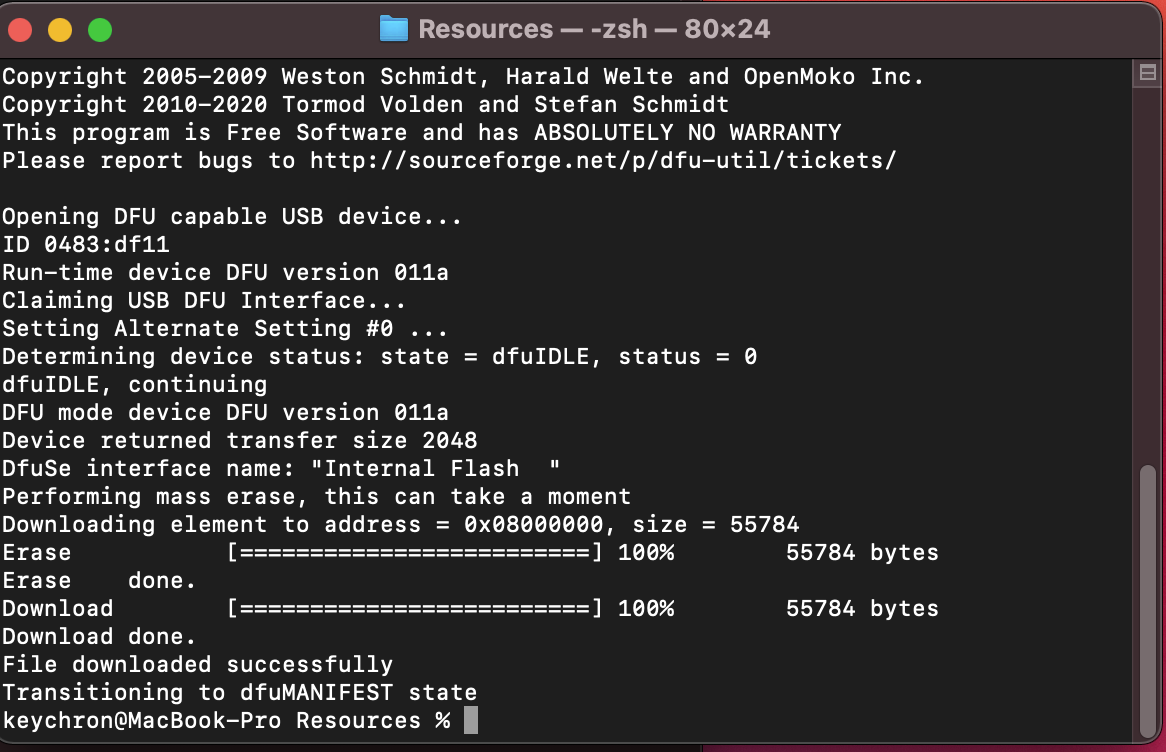
Step 4: Switch to Terminal, paste the full firmware file name, and press enter, wait for firmware flash to complete.
Windows Tutorial
Step 1: Flash K8 Pro Firmware.
Download the QMK Toolbox for Windows.
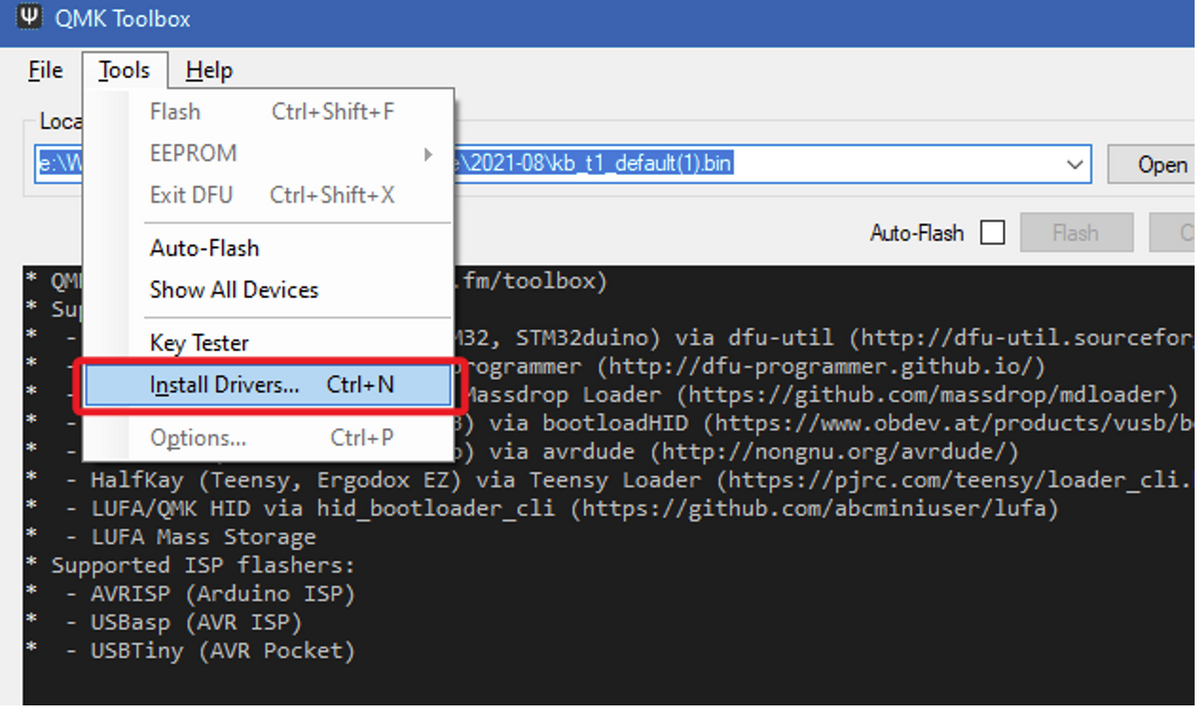
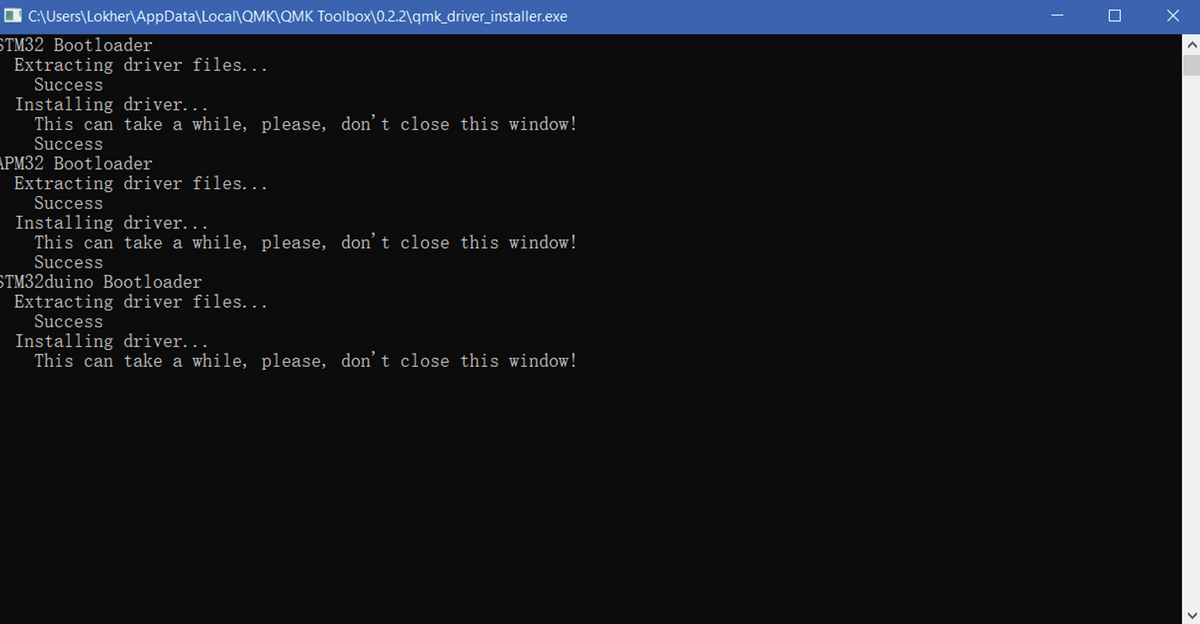
Flash K8 Pro firmware in Windows and install the bootloader driver. Select the menu "Tools">>"Install drivers" and click "Yes" to confirm. Then wait for the driver installation to complete.
Slide the switch toggle to "Off" and connect the USB cable, hold down the "Reset" button under the space bar, and then slide the toggle to "Cable". QMK Toolbox will show a yellow line about Bootloader device.
Step 2: Run Command Windows.
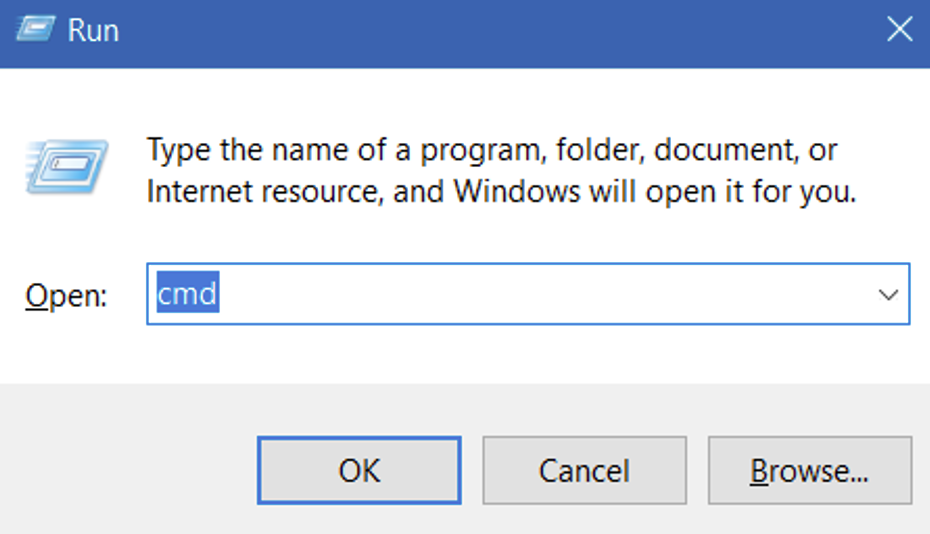
At the moment the K8 Pro keyboard cannot work, please use another keyboard to connect your computer. Press Win+R, then type “cmd" and press enter.
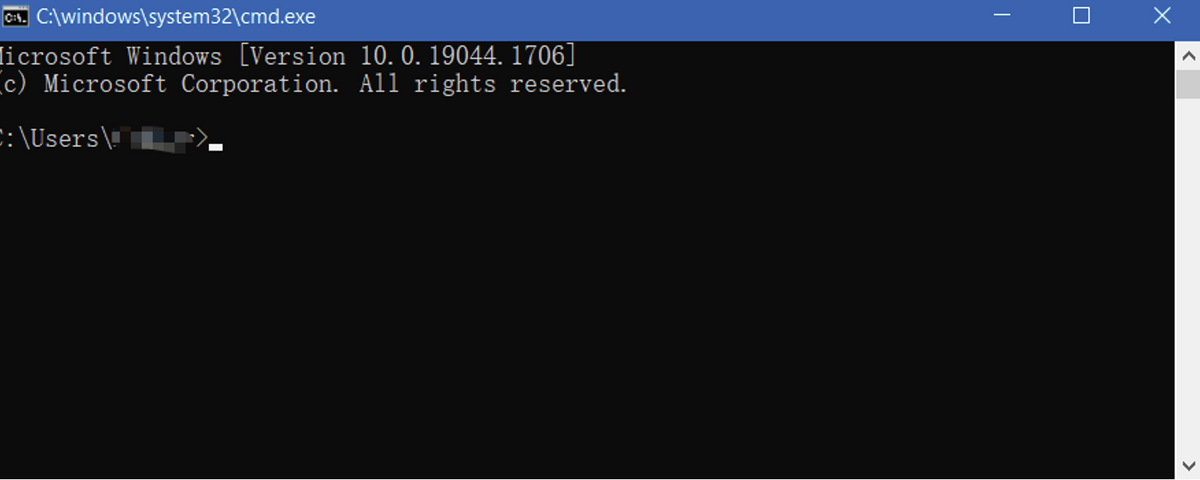
The command window looks as below.
Locate to dfu-util: Copy and paste the code below and press enter key.
cd "%LOCALAPPDATA%\QMK\QMK Toolbox"
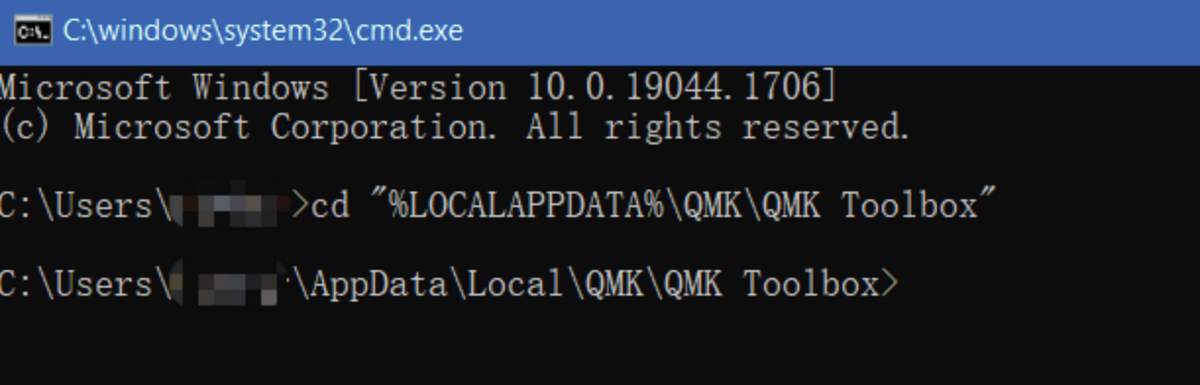
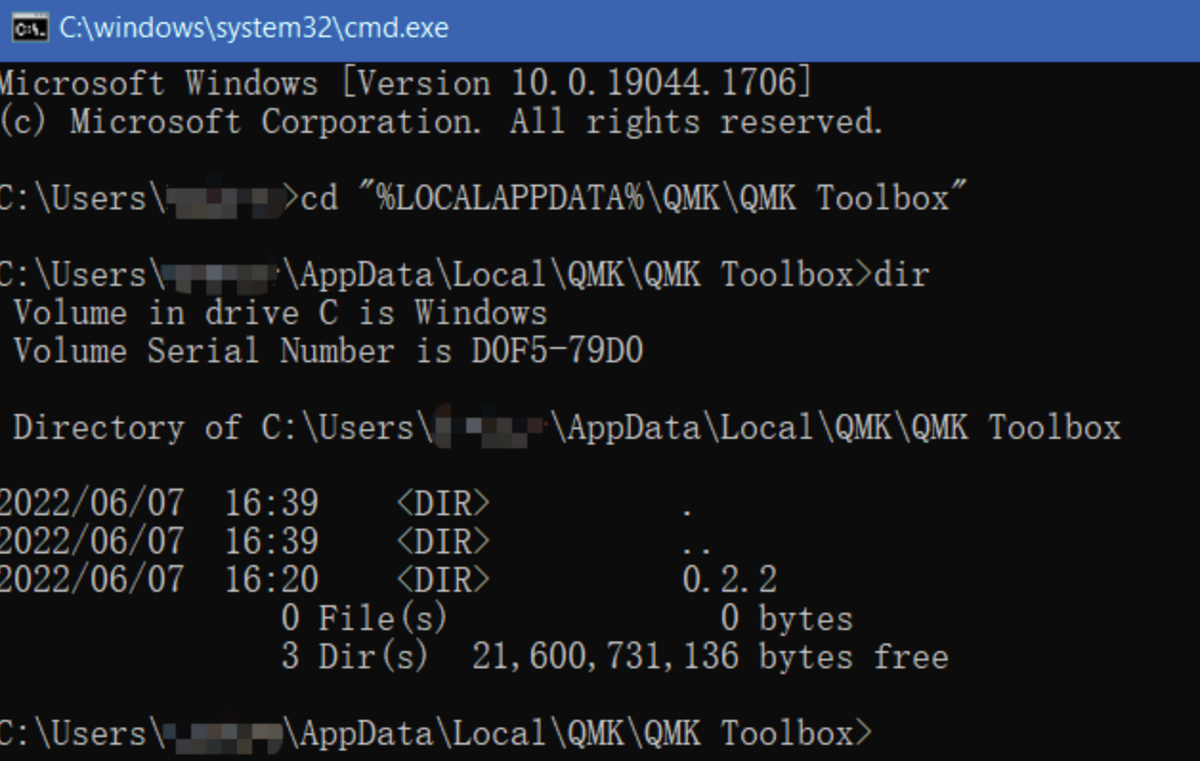
Type “dir” and enter to list QMK Toolbox version directory. “0.2.2” is the version number of the QMK Toolbox, it varies by different versions of the QMK Toolbox. Type “cd 0.2.2” to enter the QMK Toolbox directory, please change “0.2.2” according to the version on your OS.

Step 3: Get the firmware file name.
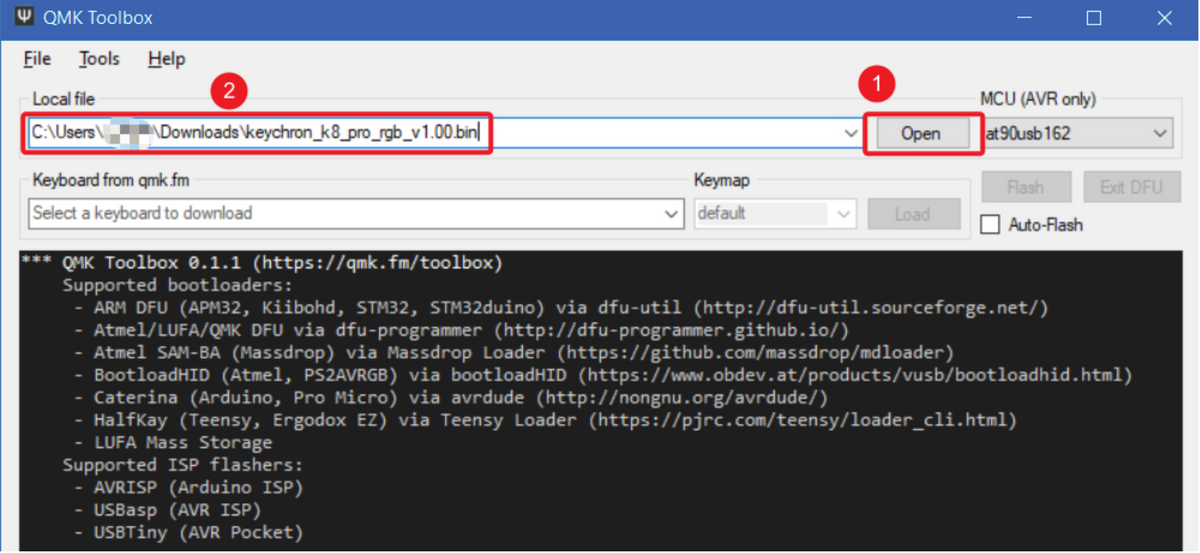
Click “Open” in QMK Toolbox and select the firmware file that fits your K8 Pro keyboard version, we will use this name later.
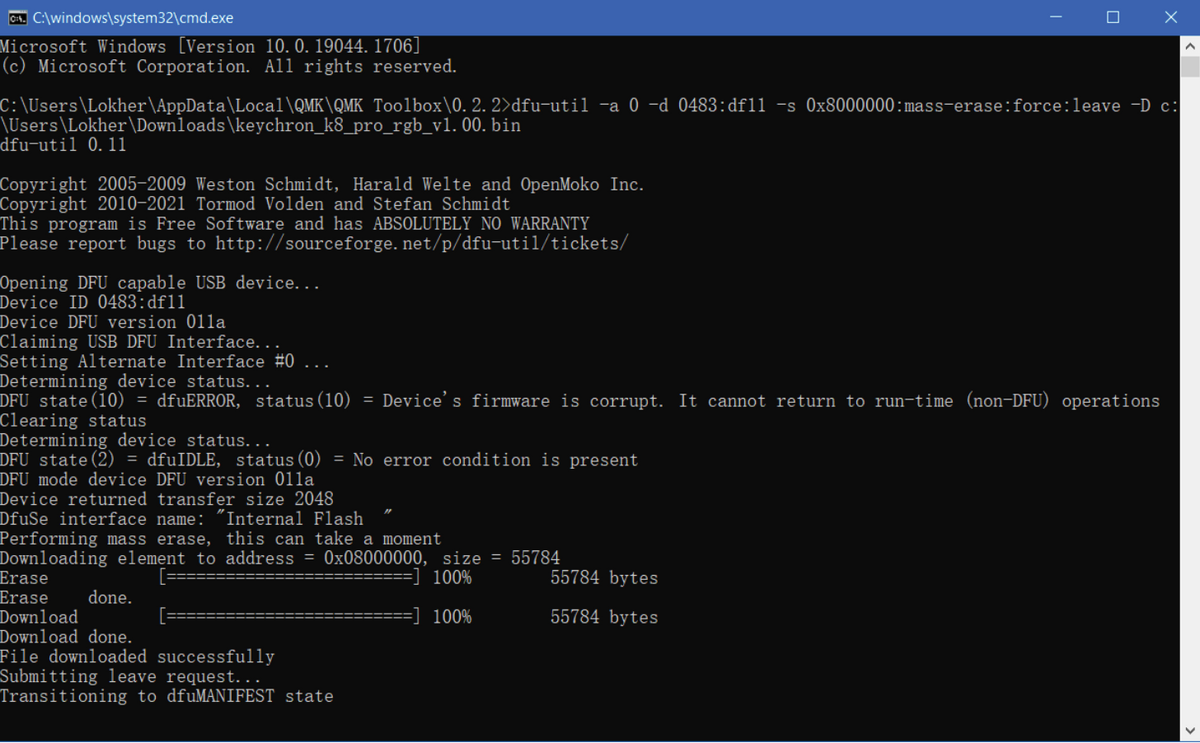
Step 4: Flash the firmware.
Copy and paste following line to the command window and add a space at the end, DO NOT press enter key: dfu-util -a 0 -d 0483:df11 -s 0x8000000:mass-erase:force:leave -D
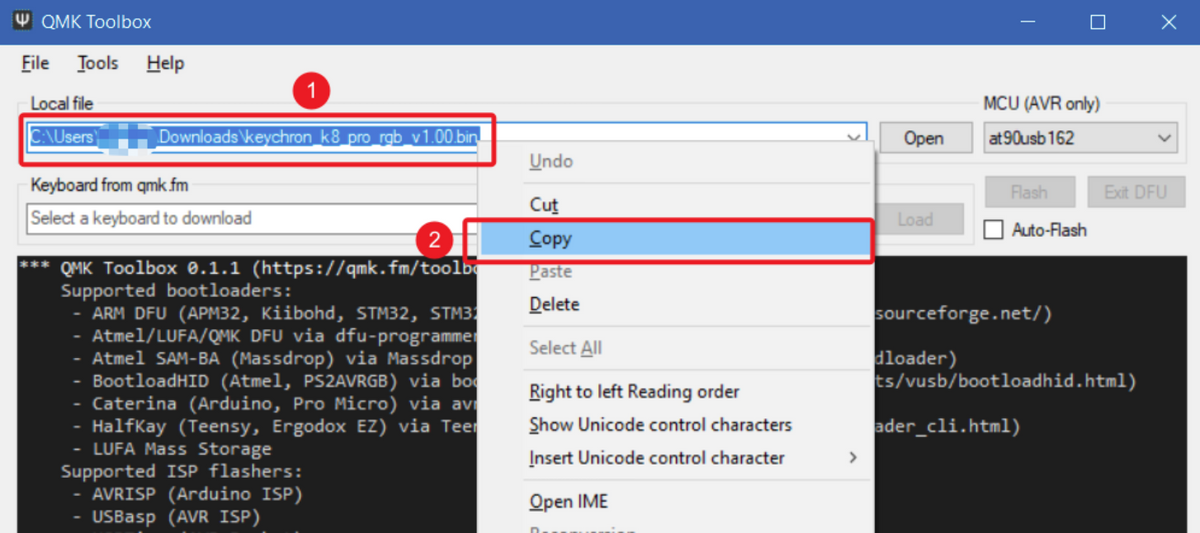
Copy the full file path from QMK Toolbox.
Final Step: Back to the command window, paste the filename, and press the enter key. Wait for firmware flash to complete.
If the full file name path include space, please add double quotation marks to file name.